 |
am6xuw00006203
REPAIR CONNECTOR REPLACEMENT/WIRING HARNESS CONNECTION
id000000002900
Repair Connector Replacement
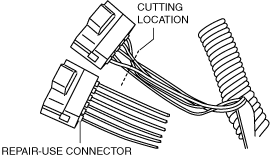
Vehicle-side Connector Cutting
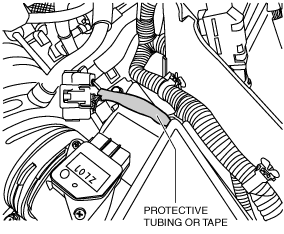
1. If tubing or electrical tape is used to protect the connector wiring harness, cut into it being careful not cut or damage the wiring, and expose approx. 200 mm {7.84 in} of the wiring from the connector.
am6xuw00006203
|
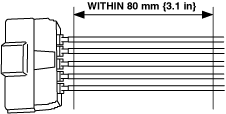
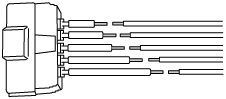
2. Cut the wiring harness once at the position near the connector so as to leave a long length of wiring harness on the vehicle side, align the length with the repair-use connector wiring harness, and then recut at the wiring harness on the vehicle side or the repair-use connector wiring harness at the appropriate position.
acmzzc00000415
|
a30zzw00004804
|
aatjjw00006957
|
Wiring Harness Connection
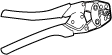
Special Service Tool (SST)
|
49 JP03 001
CRIMPING TOOL
|
 |
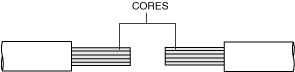
Connection Procedure Using Soldering
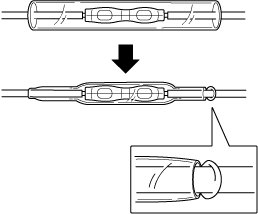
1. Line up the cores of the wiring harnesses to be connected as shown in the figure.
a30zzw00004805
|
2. Twist together both of the cores.
a30zzw00004806
|
3. Apply solder to the twisted core area.
a30zzw00004807
|
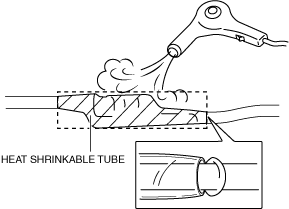
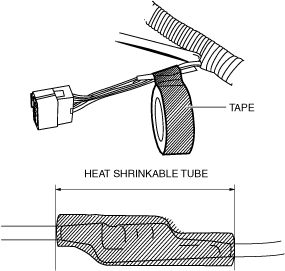
4. Set the heat-shrinkable tubing to the soldered area and shrink the heat-shrinkable tubing at a temperature of approx. 100 °C {212 °F} using a drier until the plastic melts on both ends.
acmzzc00000416
|
Connection Procedure Using Crimp Terminal
acmzzc00000417
|
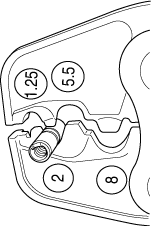
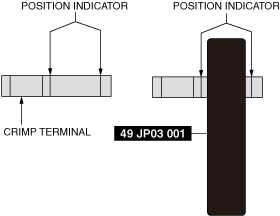
1. Select the appropriate crimp terminal and the crimping area of the special service tool according to the thickness of the wiring harness to be repaired.
|
Size (mark) |
Outer diameter |
Compatible wiring size |
Crimping area of special service tool |
|---|---|---|---|
|
S
|
3 mm {0.1 in}
|
0.5—1.0 sq
|
1.25
|
|
M
|
4 mm {0.2 in}
|
1.25—2.5 sq
|
2
|
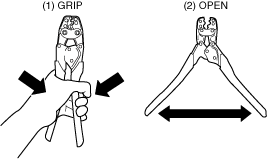
2. Squeeze the grips tightly until the ratchet of the special service tool detaches and open the handle of the special service tool.
acmzzc00000418
|
3. Place the appropriate crimp terminal on the crimping area of the special service tool and secure the crimp terminal by lightly squeezing the grips to a level that the crimping terminal does not deform.
ac5jjw00007728
|
ac9uuw00009723
|
4. Insert the wiring harness to be connected into the crimp terminal until it reaches the contact point inside the terminal.
ac5jjw00007726
|
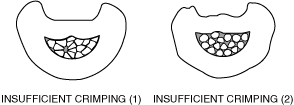
5. Crimp the crimp terminal completely by squeezing the grips of the special service tool tightly until the ratchet detaches.
6. Pull on the connected wiring harness to verify that the wiring harness does not pull out of the crimp terminal.
7. Perform the same procedure from Steps 3 to 6 for the opposite side.
8. Set the heat-shrinkable tubing to the connection area so that it is centered and shrink the heat-shrinkable tubing at a temperature of approx. 100 °C {212 °F} using a drier until the plastic melts on both ends.
ac5jjw00007721
|
Taping work
1. Tape the surface of the heat-shrinkable tubing.
a30zzw00004808
|