 |
ac30zw00001419
LIFTGATE GARNISH REMOVAL/INSTALLATION
id091600445800
Replacement part
|
Double-sided adhesive tape
Quantity: 2
Location of use: Liftgate garnish
|
1. Disconnect the negative battery terminal. (See NEGATIVE BATTERY TERMINAL DISCONNECTION/CONNECTION [(E)].)
2. Remove the following parts.
3. Remove the side spoiler. (See SIDE SPOILER REMOVAL/INSTALLATION.)
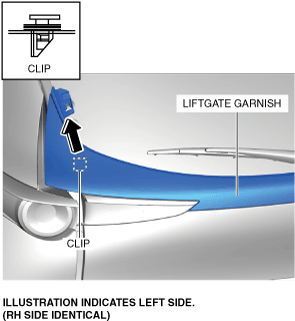
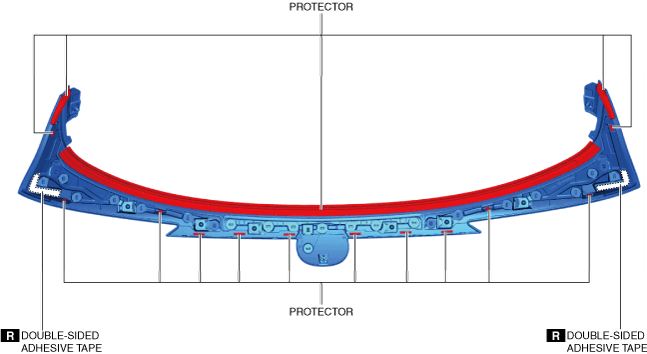
4. Peeling off the double-sided adhesive tape shown in the figure using a utility knife.
ac30zw00001419
|
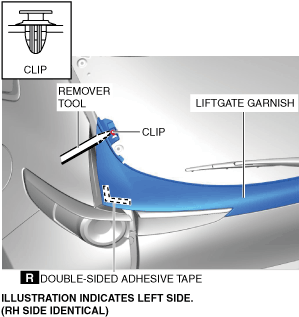
5. Using a remover tool, remove the clip.
6. Move the liftgate garnish in the direction of the arrow shown in the figure and detach the clip from the liftgate garnish.
ac30zw00004274
|
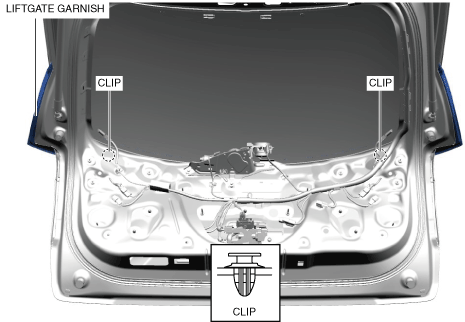
7. Detach the clip shown in the figure from the liftgate garnish from inside the cabin.Using the remover tool from the side of the vehicle shown in the figure, detach the clip from the liftgate garnish.
ac30zw00005239
|
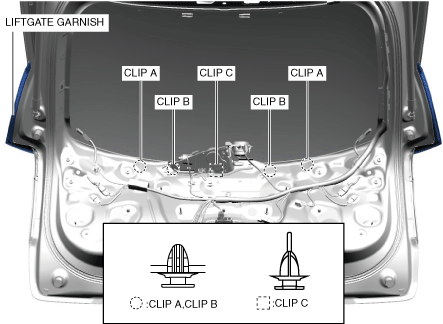
8. Detach the clips from the liftgate garnish one at a time in the order of clips A, clips B, and clip C, from inside the cabin.Insert the remover tool into the position shown in the figure and detach the clips on the vehicle exterior from the liftgate garnish one location at a time.
ac30zw00005240
|
9. Insert the remover tool into the position shown in the figure and detach the clip from the liftgate garnish.
ac30zw00004277
|
10. Remove the liftgate garnish.
11. Remove the remaining clips on the liftgate and install them to the liftgate garnish.
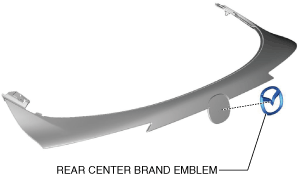
12. Remove the rear center brand emblem. (when removing the rear center brand emblem)
ac30zw00004721
|
13. Install in the reverse order removal. (See Liftgate Garnish Installation Note.)
Liftgate Garnish Installation Note
1. When a liftgate garnish is to be reused, perform the following procedure:
ac30zw00001424
|