• Depending on the vehicle, the cooling fan may operate suddenly even when the ignition switch is turned off. Therefore, keep hands and tools away from the cooling fan even if the cooling fan is not operating to prevent injury to personnel or damage to the cooling fan. Always disconnect the negative battery cable when servicing the cooling fan or parts near the cooling fan.
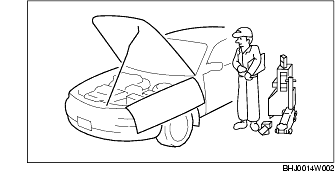
• Always be sure to cover fenders, seats and floor areas before starting work.
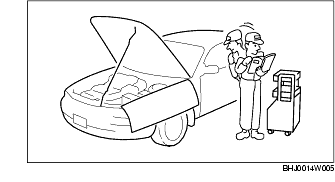
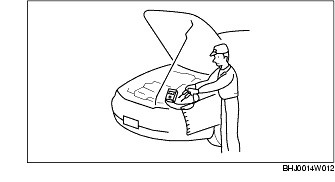
• Be sure that all necessary tools and measuring equipment are available before starting any work.
• Use special service tools or equivalent when they are required.
• Before beginning any work, turn the ignition switch to LOCK position, then disconnect the negative battery cable and wait for more than 1 min. to allow the backup power supply of the SAS control module to deplete its stored power. Disconnecting the battery cable will delete the memories of the clock, audio, and DTCs, etc. Therefore, it is necessary to verify those memories before disconnecting the cable.
• If the battery had been disconnected during vehicle maintenance or for other reasons, the window will not fully close automatically. Carry out the power window each switch initial setting. (See POWER WINDOW SYSTEM INITIAL SETTING.)
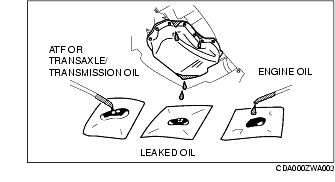
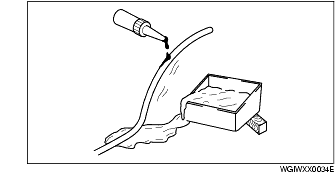
• Use either of the following procedures to identify the type of oil that is leaking:
1. Remove any oil on the engine or transaxle/transmission.
2. Pour the fluorescent dye into the engine oil or ATF (or transaxle/transmission oil).
3. Allow the engine to run for 30 min.
4. Inspect for dye leakage by irradiating with UV light (black light), and identify the type of oil that is leaking.
5. If no dye leakage is found, allow the engine to run for another 30 min. or drive the vehicle then reinspect.
6. Find where the oil is leaking from, then make necessary repairs.
1. Gather some of the leaking oil using an absorbent white tissue.
2. Take samples of engine oil and ATF (or transaxle/transmission oil), both from the dipstick, and place them next to the leaked oil already gathered on the tissue.
3. Compare the appearance and smell, and identify the type of oil that is leaking.
4. Remove any oil on the engine or transaxle/transmission.
5. Allow the engine to run for 30 min.
6. Check the area where the oil is leaking, then make necessary repairs.
• While correcting a problem, also try to determine its cause. Begin work only after first learning which parts and subassemblies must be removed and disassembled for replacement or repair. After removing the part, plug all holes and ports to prevent foreign material from entering.
• If the disassembly procedure is complex, requiring many parts to be disassembled, all parts should be marked in a place that will not affect their performance or external appearance and identified so that reassembly can be performed easily and efficiently.
• When removed, each part should be carefully inspected for malfunction, deformation, damage and other problems.
• All disassembled parts should be carefully arranged for reassembly.
• Be sure to separate or otherwise identify the parts to be replaced from those that will be reused.
• All parts to be reused should be carefully and thoroughly cleaned in the appropriate method.
• Standard values, such as torques and certain adjustments, must be strictly observed in the reassembly of all parts.
• If removed, the following parts should be replaced with new ones:
• Depending on location:
• Use suitable gauges and testers when making adjustments.
• Prevent gasoline or oil from getting on rubber parts or tubing.
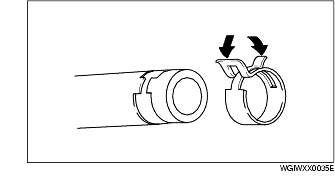
• When reinstalling, position the hose clamp in the original location on the hose and squeeze the clamp lightly with large pliers to ensure a good fit.
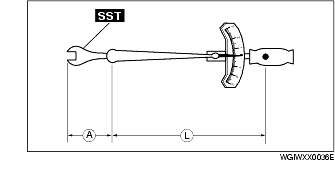
• When using a torque wrench-SST or equivalent combination, the written torque must be recalculated due to the extra length that the SST or equivalent adds to the torque wrench. Recalculate the torque by using the following formulas. Choose the formula that applies to you.
|
Torque Unit
|
Formula
|
|---|---|
|
N·m
|
N·m × [L/(L+A)]
|
|
kgf·m
|
kgf·m × [L/(L+A)]
|
|
kgf·cm
|
kgf·cm × [L/(L+A)]
|
|
ft·lbf
|
ft·lbf × [L/(L+A)]
|
|
in·lbf
|
in·lbf × [L/(L+A)]
|
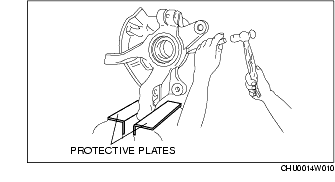
• When using a vise, put protective plates in the jaws of the vise to prevent damage to parts.
• When inspecting and servicing the power train on the dynamometer or speed meter tester, pay attention to the following:
• Brake tester
• Chassis dynamometer/speed meter tester
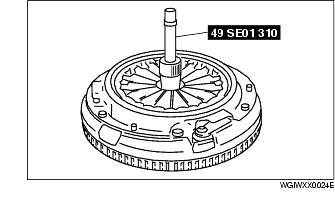
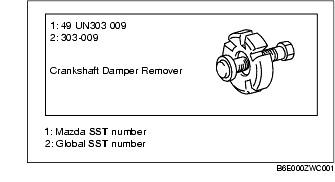
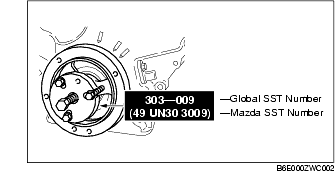
• Some global SST or equivalent are used as SSTs necessary for engine repair. Note that these SSTs are marked with global SST numbers.
• Note that a global SST number is written together with a corresponding Mazda SST number as shown below.
Example (section 01-60)
Example (except section 01-60)