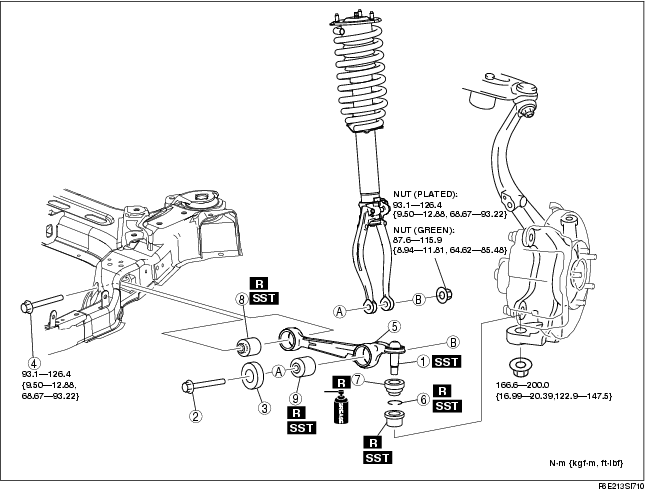
1. Remove in the order indicated in the table.
2. Install in the reverse order of removal.
.
|
1
|
Front lower arm (front) ball joint
|
|
2
|
Bolt (front shock absorber lower side)
|
|
3
|
Dynamic damper
|
|
4
|
Bolt (front lower arm inner side)
|
|
5
|
Front lower arm (front) component
|
|
6
|
Clip
(See Clip Installation Note.)
|
|
7
|
Dust boot
|
|
8
|
Front lower arm (front) bushing (inner side)
|
|
9
|
Front lower arm (front) bushing (outer side)
|
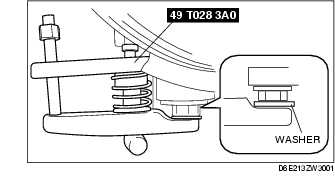
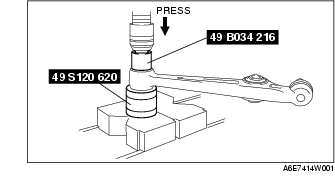
1. Insert a washer between the SST and the nut to prevent damage to the locknut.
2. Disconnect the ball joint using the SST.
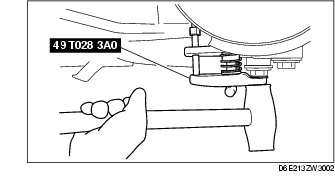
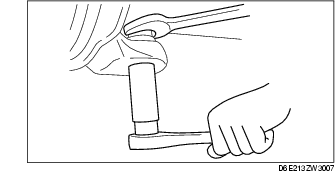
3. If the ball joint cannot be disconnected in Step 2, tap the SST from the bottom using a copper hammer.
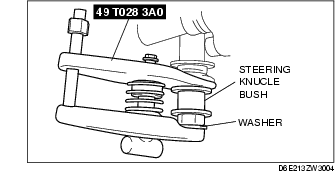
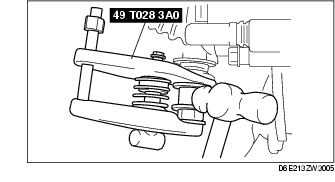
1. With the steering knuckle bushing installed to the ball joint, remove the front lower arm (front) from the steering knuckle.
2. Install the nut to the front lower arm (front) ball joint and remove the steering knuckle bushing using the SST. At this time, insert a washer between the SST and the locknut to prevent damage to the locknut.
3. If the steering knuckle bushing cannot be removed in Step 2, tap the steering knuckle bushing with a hammer and remove the steering knuckle bushing.
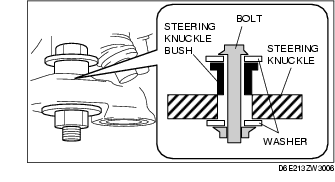
1. Install the steering knuckle bushing to the steering knuckle using a multi-purpose bolt and nut, and washers.
2. Tighten the bolt and nut to press-in the steering knuckle bushing to the steering knuckle.
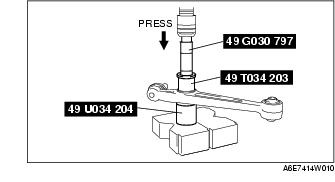
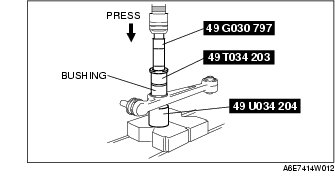
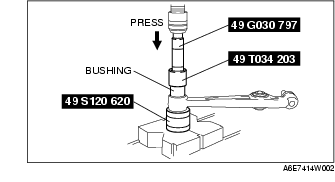
1. Press the bushing (inner side) out using the SSTs.
1. Press the bushing (outer side) out using the SSTs.
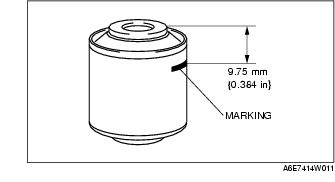
1. Mark the new bushing as shown in the figure.
2. Press the bushing in to the marking using the SSTs.
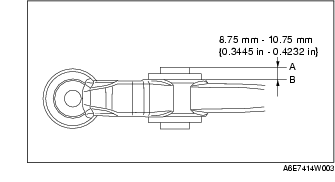
3. Verify that clearance distance A-B is 8.75 mm-10.75 mm {0.3445 in-0.4232 in}.
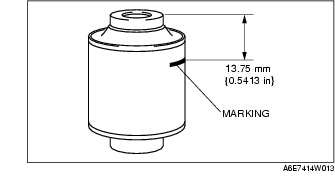
1. Mark the new bushing as shown in the figure.
2. Press the bushing in to the marking using the SSTs.
3. Verify that clearance distance A-B is 12.75 mm-14.75 mm {0.5020 in-0.5807 in}.
1. Wipe the grease off the ball stud.
2. Fill the inside of the new dust boot with grease.
3. Install the boot on the ball joint.
4. Install the new clip using the SST.
5. Verify that the clip is installed securely to the groove.
6. Wipe away the excess grease.