|
am3zzw00035609
OIL PAN REMOVAL/INSTALLATION [SKYACTIV-X 2.0]
id0111hf800200
Replacement part
|
Oil pan gasket
Quantity: 1
Location of use: Oil pan
|
Oil and chemical type
|
Silicone sealant
Type: TB1217D
|
1. Disconnect the negative battery terminal. (See BATTERY REMOVAL/INSTALLATION [SKYACTIV-X 2.0].)
2. Remove front under cover No.2. (See FRONT UNDER COVER No.2 REMOVAL/INSTALLATION.)
3. Drain the engine oil. (See ENGINE OIL REPLACEMENT [SKYACTIV-X 2.0].)
4. Remove the seal plate.
am3zzw00035609
|
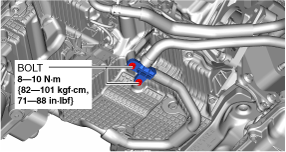
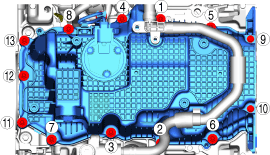
5. Remove the bolts shown in the figure.
am3zzw00035610
|
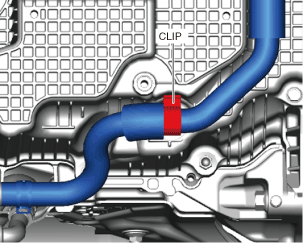
6. Remove using the procedure shown in the figure.
7. Install in the reverse order of removal.
8. Add engine oil to the specified level. (See ENGINE OIL REPLACEMENT [SKYACTIV-X 2.0].)
9. Start the engine and confirm that there is no oil leakage.
10. Inspect the engine oil amount. (See ENGINE OIL LEVEL INSPECTION [SKYACTIV-X 2.0].)
am3zzw00035611
|
|
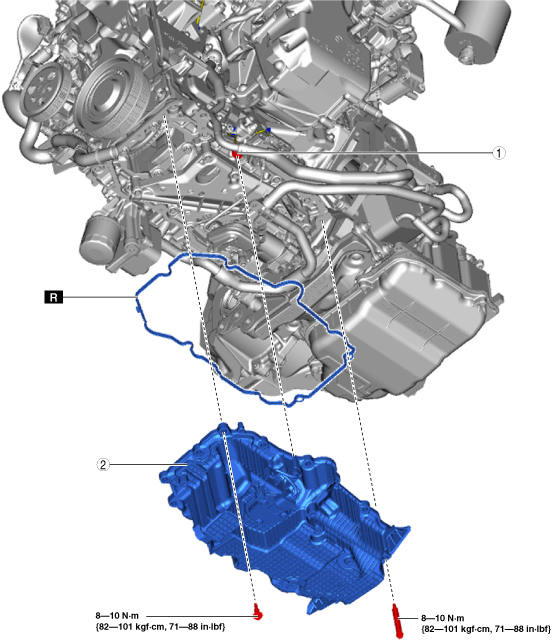
1
|
Emission wiring harness connector
|
|
2
|
Oil pan, engine oil level sensor, short cord component
(See Oil Pan Removal Note.)
(See Oil Pan Installation Note.)
|
Oil Pan Removal Note
1. When replacing the oil pan, remove the short cord. (See ENGINE OIL LEVEL SENSOR REMOVAL/INSTALLATION [SKYACTIV-X 2.0].)
am3zzw00036854
|
Oil Pan Installation Note
1. When the oil pan is replaced, install a new engine oil level sensor and a new short cord. (See ENGINE OIL LEVEL SENSOR REMOVAL/INSTALLATION [SKYACTIV-X 2.0].)
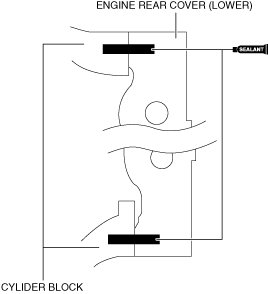
2. Completely remove any oil, dirt, and silicone sealant adhering to the cylinder block and oil pan.
3. Apply silicone sealant (TB1217D) to the areas shown in the figure.
am3zzw00035612
|
4. Install the oil pan.
5. Tighten the bolts in the order shown in the figure.
am30jw00000501
|