 |
am3zzw00030480
STARTER REMOVAL/INSTALLATION [SKYACTIV-D 1.8]
id0119s8800200
Operation After Replacing Starter
|
Step |
Action |
|---|---|
|
1
|
Switch the ignition ON (engine off).
|
|
2
|
Apply the parking brake firmly.
|
|
3
|
Shift the selector lever to the N position. (ATX)
Shift the shift lever to the neutral position. (MTX)
|
|
4
|
Depress and release the accelerator pedal 12 times with the brake pedal depressed.
|
|
5
|
Long-press the i-stop OFF switch (for 5 s or more).
|
|
6
|
Switch the ignition off.
|
|
7
|
Start the engine.
|
|
8
|
Verify that the i-stop warning light (amber) turns off.
• If the light does not turn off, switch the ignition off and repeat the procedure from Step 1.
|
|
9
|
Switch the ignition off and disconnect the negative battery cable. (See NEGATIVE BATTERY TERMINAL DISCONNECTION/CONNECTION [(E)].)
|
|
10
|
Verifying battery condition initialization setting (i-stop setting). (See BATTERY CONDITION INITIALIZATION SETTING (i-stop SETTING).)
|
Starter Removal/Installation
1. Disconnect the negative battery cable. (See NEGATIVE BATTERY TERMINAL DISCONNECTION/CONNECTION [(E)].)
2. Remove the front under cover No.2. (See FRONT UNDER COVER No.2 REMOVAL/INSTALLATION.)
3. Remove the following parts as a single unit: (See INTAKE-AIR SYSTEM REMOVAL/INSTALLATION [SKYACTIV-D 1.8].)
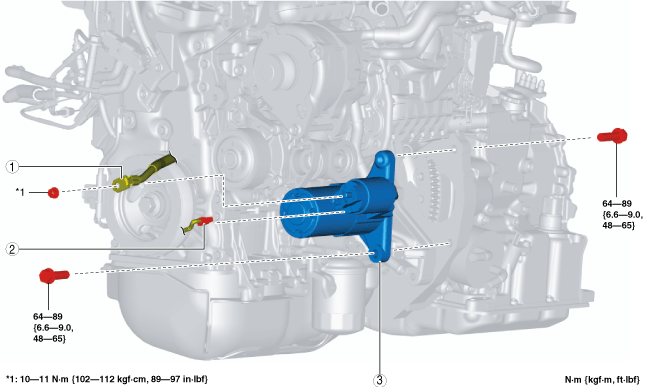
4. Remove in the order indicated in the table.
5. Install in the reverse order of removal.
am3zzw00030480
|
|
1
|
Terminal B cable
|
|
2
|
Terminal S connector
|
|
3
|
Starter
(See Starter removal note.)
|
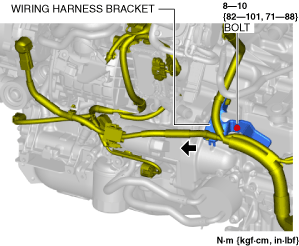
Terminal B cable disconnection note
1. Remove the wiring harness bracket bolt and move the wiring harness in the direction of the arrow shown in the figure so that the terminal B cable can be disconnected.
am3zzw00030481
|
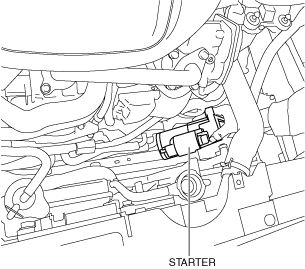
Starter removal note
1. Remove the 2 electric water pump bolts from the underside of the vehicle.
am3zzw00030482
|
2. Remove the starter lower bolt from the underside of the vehicle.
am3zzw00030483
|
3. Remove the starter upper bolt from above the engine compartment.
4. Remove the starter from the above the engine compartment.
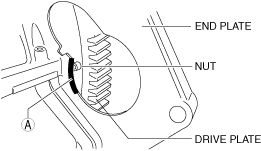
Starter installation note (ATX)
am3zzw00030484
|