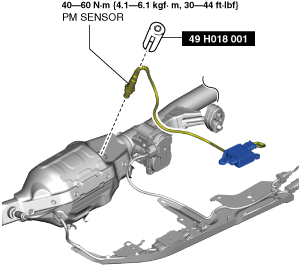
49 H018 001
Wrench

PM SENSOR REMOVAL/INSTALLATION [SKYACTIV-D 1.8]
id0140s1825900
Special Service Tool (SST)
|
49 H018 001
Wrench
|
|
Replacement Part
|
Band
Quantity: 6
Location of use: PM sensor
|
1. Disconnect the negative battery terminal. (See NEGATIVE BATTERY TERMINAL DISCONNECTION/CONNECTION [(E)].)
2. Remove the tunnel cover. (See EXHAUST SYSTEM REMOVAL/INSTALLATION [SKYACTIV-D 1.8].)
3. Remove the floor under cover No.1 (LH). (See FLOOR UNDER COVER REMOVAL/INSTALLATION.)
4. Disconnect the connectors shown in the figure.
am3zzw00030947
|
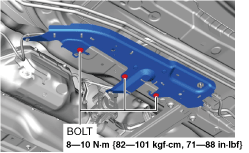
5. Remove the bolts shown in the figure.
am3zzw00030948
|
6. Remove the following parts as a single unit: (See EXHAUST SYSTEM REMOVAL/INSTALLATION [SKYACTIV-D 1.8].)
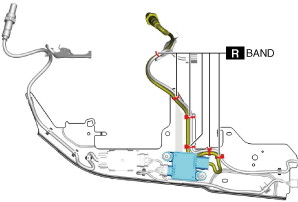
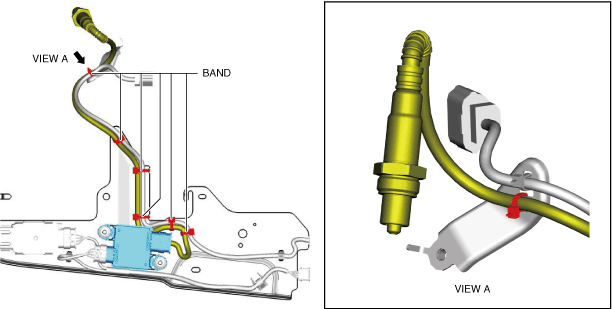
7. Cut the bands shown in the figure. (See Band Installation Note.)
am3zzw00030963
|
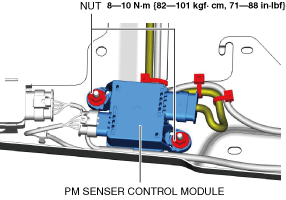
8. Remove the PM sensor control module from the module bracket.
am3zzw00030950
|
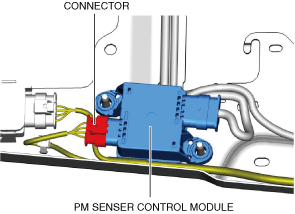
9. Disconnect the connector shown in the figure.
am3zzw00030951
|
10. Remove the PM sensor using the SST.
am3zzw00030952
|
11. Install in the reverse order of removal.
Band Installation Note
1. Install bands as shown in the figure.
am3zzw00030953
|