1. Disconnect the negative battery cable.
2. Remove the battery and battery tray. (See BATTERY REMOVAL/INSTALLATION [L8, LF, L3, L3 Turbo].)
3. Remove the air cleaner, charge air cooler cover, and air hose. (See INTAKE AIR SYSTEM REMOVAL/INSTALLATION [L3 Turbo].)
4. Remove the under cover.
5. Remove the oil filter and oil cooler component with the water hoses still connected. Position the oil filter and oil cooler component so that it is out of the way.
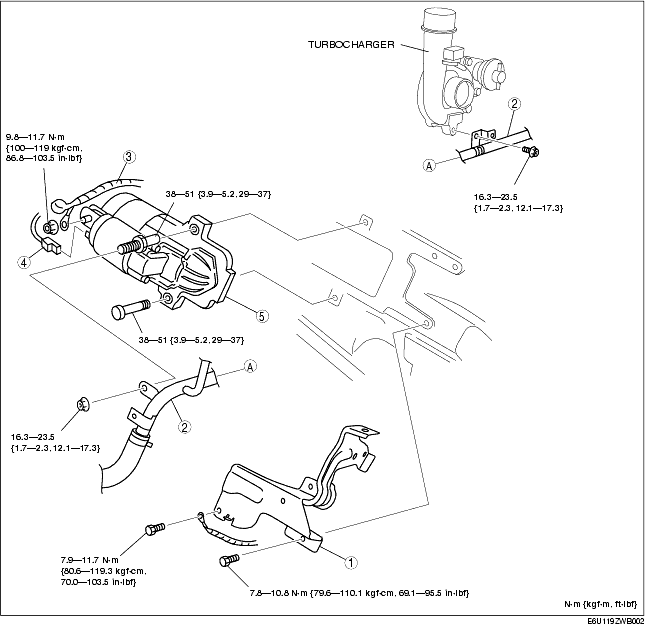
6. Remove in the order indicated in the table.
7. Install in the reverse order of removal.
8. Inspect the engine oil level. (See ENGINE OIL LEVEL INSPECTION [L3 Turbo].)
|
1
|
Harness bracket
|
|
2
|
Heater pipe
(See Heater Pipe Removal Note.)
|
|
3
|
Terminal B cable
|
|
4
|
Terminal S connector
|
|
5
|
Starter
(See Starter Installation Note.)
|
1. Remove the heater pipe with the water hoses still connected. Position the heater pipe so that it is out of the way.
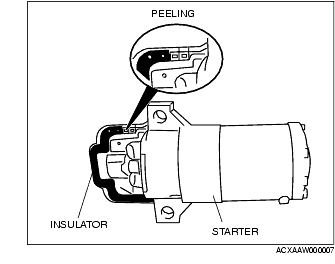
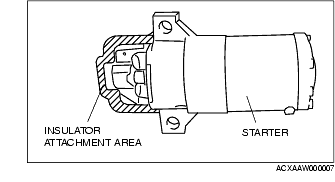
1. Peel off the insulator from the starter completely using a scraper.
2. Degrease the insulator attachment area.
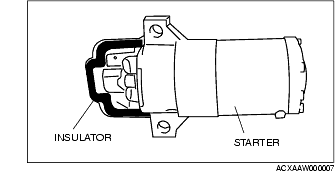
3. Attach a new insulator to the starter.