1. Remove the negative battery cable.
2. Remove the middle pipe, TWC and front pipe. (See EXHAUST SYSTEM REMOVAL/INSTALLATION [L3 Turbo].)
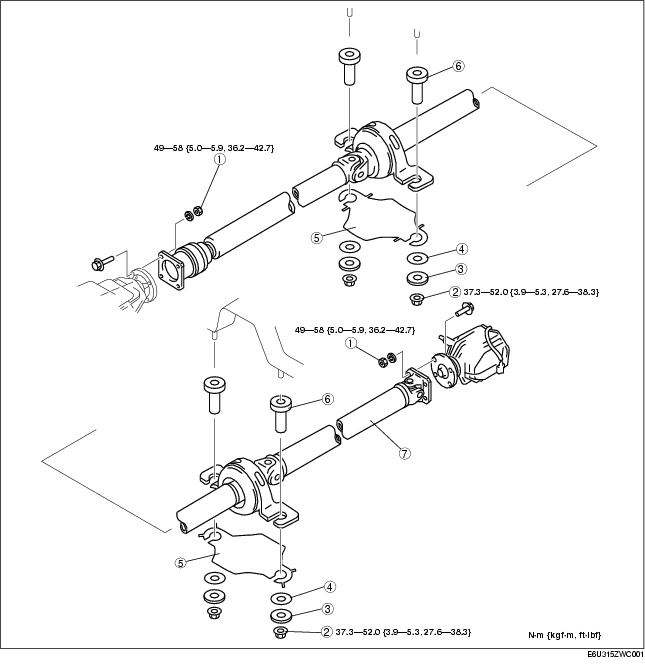
3. Remove in the order indicated in the figure.
4. Install in the reverse order of removal.
|
1
|
Nut
(See Nut Removal Note.)
|
|
2
|
Nut
|
|
3
|
Bush, spacer
|
|
4
|
Washer
|
|
5
|
Propeller shaft heat shield
|
|
6
|
Bush, spacer
|
|
7
|
Propeller shaft
|
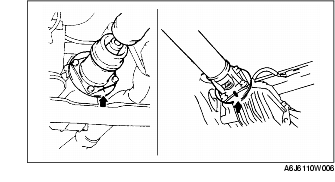
1. Before removing the nut, place alignment marks on the companion flange (front) and constant velocity joint, and on the companion flange (rear) and yoke.
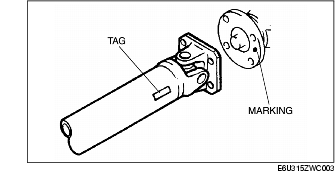
1. Align the alignment marks and install the propeller shaft.
2. When installing a new propeller shaft, align the rear differential companion flange mark with the tag on the propeller shaft so that they are at the nearest position, and assemble.
3. Perform a road test and verify that there is no abnormal vibration or noise.
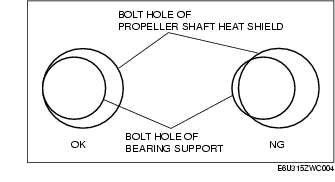
1. Assemble the propeller shaft heat shield to the bearing support.
Front
Rear
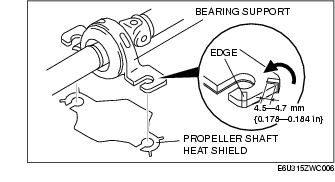
2. Fold back the propeller shaft heat shield tab as shown in the figure.