1. Disconnect the negative battery cable.
2. Discharge the refrigerant from the system. (See REFRIGERANT RECOVERY.) (See REFRIGERANT CHARGING.)
3. Remove the shroud panel. (See SHROUD PANEL REMOVAL/INSTALLATION.)
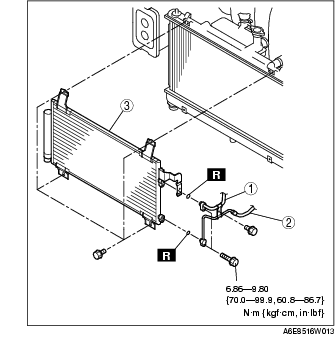
4. Remove in the order indicated in the table. Do not allow compressor oil to spill.
|
1
|
Cooler pipe No.1
|
|
2
|
Cooler pipe No.2
|
|
3
|
Condenser
(See Condenser Installation Note.)
|
5. Install in the reverse order of removal.
6. Perform the refrigerant system performance test. (See REFRIGERANT SYSTEM PERFORMANCE TEST.)
1. When installing a new condenser, add a supplemental amount of ATMOS GU10 compressor oil inlet the refrigerant cycle.
Supplemental amount (approx. quantity)