|
am3zzw00034945
DECOUPLING RING TENSIONER REMOVAL/INSTALLATION [SKYACTIV-X 2.0]
id0110hf362600
1. Remove the splash shield (RH). (See SPLASH SHIELD REMOVAL/INSTALLATION.)
2. Remove the right wall. (See SIDE WALL REMOVAL/INSTALLATION [SKYACTIV-X 2.0].)
3. Remove the coolant reserve tank. (See COOLANT RESERVE TANK REMOVAL/INSTALLATION [SKYACTIV-X 2.0].)
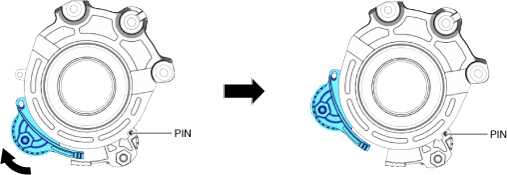
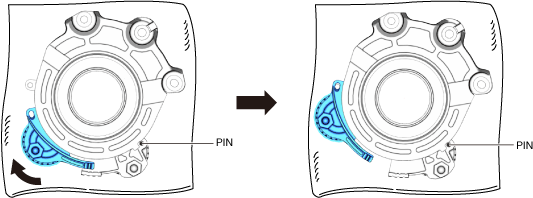
4. Attach a wrench to the cast hexagon part of the decoupling ring tensioner and slowly rotate the decoupling ring tensioner in the direction shown in the figure.
am3zzw00034945
|
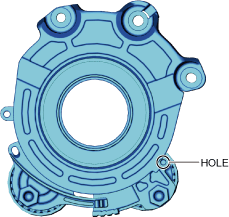
5. Insert the pin into the hole shown in the figure.
am3zzw00034946
|
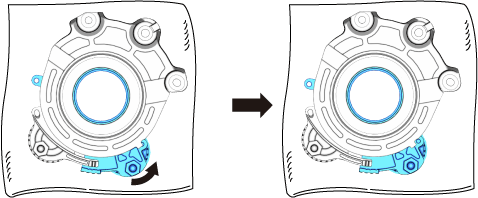
6. Attach a wrench to the cast hexagon part of the decoupling ring tensioner and slowly rotate the decoupling ring tensioner in the direction shown in the figure to release the tension.
am3zzw00034947
|
7. Set the generator drive belt aside.
8. Remove the bolts.
am3zzw00034948
|
9. Remove the decoupling ring tensioner as shown in the figure.
am3zzw00034949
|
10. Install in the reverse order of removal. (See Decoupling Ring Tensioner Installation Note.)
Decoupling Ring Tensioner Installation Note
1. Attach a wrench to the cast hexagon part of the decoupling ring tensioner and slowly rotate the decoupling ring tensioner in the direction shown in the figure.
am3zzw00034950
|
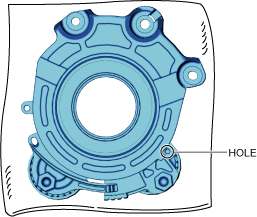
2. Insert the pin into the hole shown in the figure.
am3zzw00034951
|
3. Attach a wrench to the cast hexagon part of the decoupling ring tensioner and slowly rotate the decoupling ring tensioner in the direction shown in the figure.
am3zzw00034952
|
4. Insert the pin into the hole shown in the figure.
am3zzw00031326
|
5. Install the generator drive belt.
6. Install the decoupling ring tensioner.