 |
ac30zw00001555
COWL PANEL REMOVAL/INSTALLATION [(E)]
id0910008020x2
1. Disconnect the negative battery terminal. (See NEGATIVE BATTERY TERMINAL DISCONNECTION/CONNECTION [(E)].)
2. Remove the brake fluid reserve tank (sub) from the cowl panel. (with Mazda M Hybrid) (See ELECTRONICALLY CONTROLLED BRAKE UNIT REMOVAL/INSTALLATION [L.H.D.].) (See ELECTRONICALLY CONTROLLED BRAKE UNIT REMOVAL/INSTALLATION [R.H.D.].)
3. Remove the following parts:
4. Disconnect the connectors.
ac30zw00001555
|
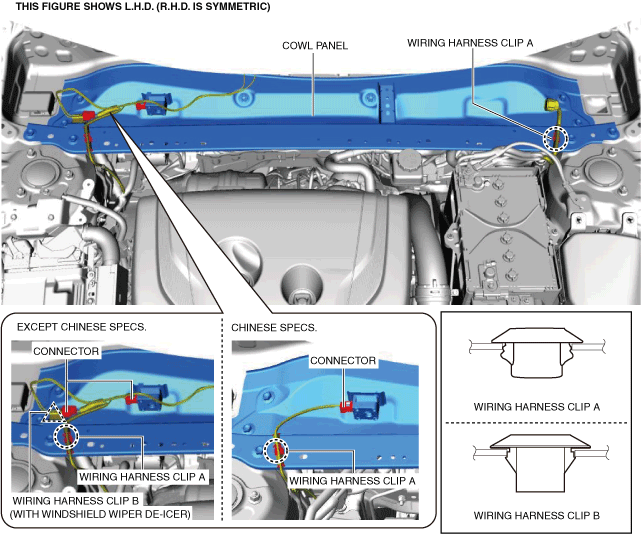
5. Remove wiring harness clips A.
6. Remove wiring harness clip B. (with windshield wiper de-icer)
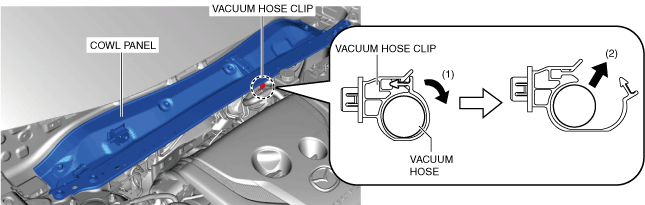
7. Open the vacuum hose clip in the direction of arrow (1) shown in the figure and remove the vacuum hose in the direction of arrow (2).
ac30zw00001556
|
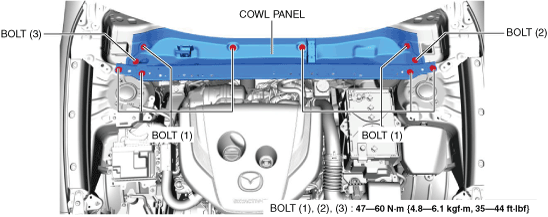
8. Remove the bolts shown in the figure in the order of (1), (2) and (3).
ac30zw00001557
|
9. Remove the cowl panel.
10. Install in the reverse order of removal.