 |
ac30zw00000163
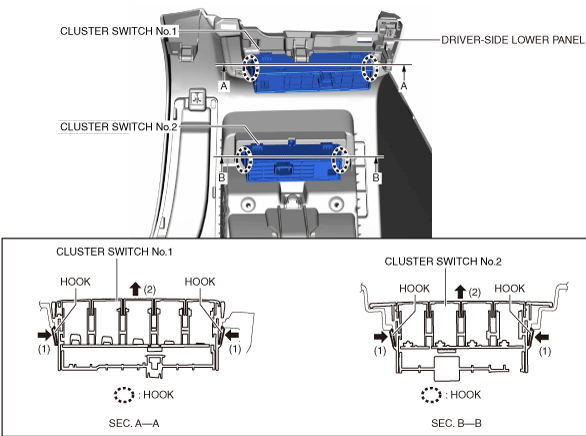
CLUSTER SWITCH REMOVAL/INSTALLATION
id091700460800
1. Disconnect the negative battery terminal. (See NEGATIVE BATTERY TERMINAL DISCONNECTION/CONNECTION [(E)].)
2. Remove the following parts:
3. With the hooks pressed in the direction of arrows (1) shown in the figure, push out the cluster switch No.1 in the direction of arrow (2) and remove it from the driver-side lower panel.
ac30zw00000163
|
4. With the hooks pressed in the direction of arrows (1) shown in the figure, push out the cluster switch No.2 in the direction of arrow (2) and remove it from the driver-side lower panel.
5. Install in the reverse order of removal.