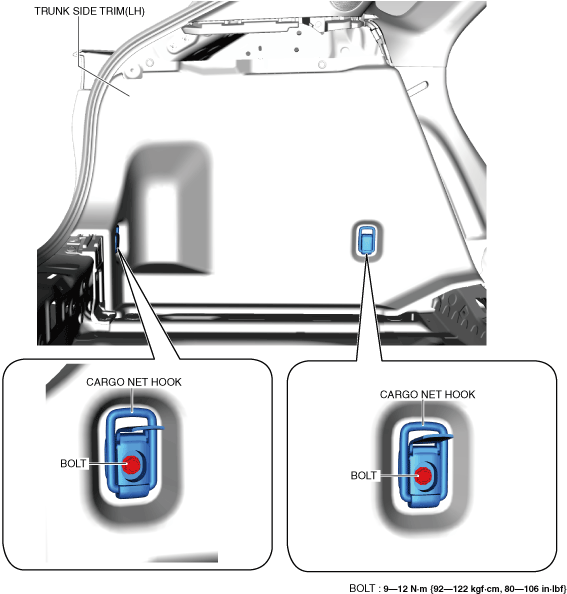
4. Open the cargo net hook cover and remove the bolt.
ac30zw00000925
5. Remove the cargo net hooks.
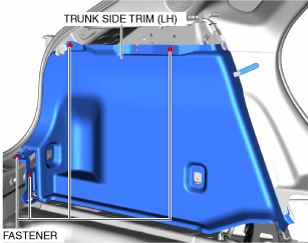
6. Remove the fasteners.
ac30zw00000926
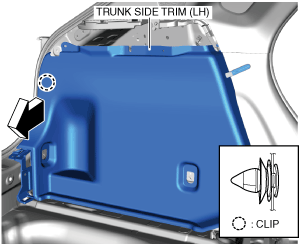
7. Move the trunk side trim (LH) in the direction of the arrow shown in the figure while detaching the clip.
ac30zw00000927
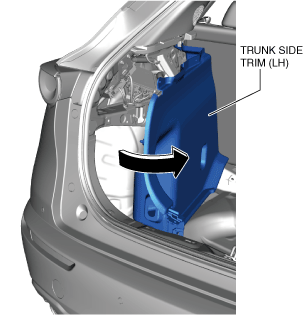
8. Partially peel the trunk side trim (LH).
ac30zw00000928
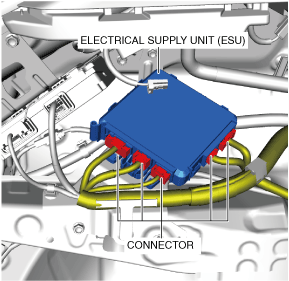
9. Disconnect the connectors.
ac30zw00000929
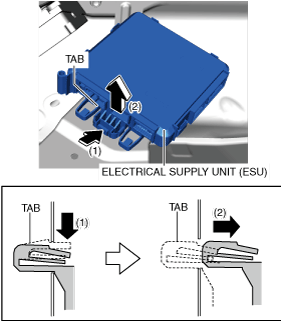
10. While pressing the electrical supply unit (ESU) tab in the direction of arrow (1) shown in the figure, pull the electrical supply unit (ESU) in the direction of arrow (2) and detach the electrical supply unit (ESU) tab from the electrical supply unit (ESU) bracket.
ac30zw00000930
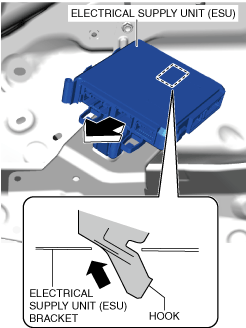
11. Pull the electrical supply unit (ESU) in the direction of the arrow shown in the figure and detach the hook from the electrical supply unit (ESU) bracket.
ac30zw00000931
12. Remove the electrical supply unit (ESU).
13. Install in the reverse order of removal.
14. If the electrical supply unit (ESU) is replaced, perform the following procedure.
(1) Return to the M-MDS operation and press [Continue].
(2) When the M-MDS processing is completed, press [Next].
(3) When the M-MDS processing is completed, press [Next].
(4) Verify that the following conditions/operations are met/completed, mark the check boxes, and then press [Next].
• Switch the ignition ON (engine off).
• Install battery charger to vehicle
• Battery voltage: 11.6 V or more
• Connect power cable to M-MDS
• Front doors on both sides and liftgate are open
(5) Press [Finish].
(6) Switch the ignition OFF.
(7) Switch the ignition ON (engine off or on) and wait for 1 s or more to complete the global central configuration (GCC) for the electrical supply unit (ESU) and synchronization between the electrical supply unit (ESU) and the following parts.