 |
am6zzw00011892
PCM REMOVAL/INSTALLATION [L3 Turbo]
id0140b6802400
1. Disconnect the negative battery cable.
2. Remove in the order indicated in the table.
3. Install in the reverse order of removal.
L.H.D.
am6zzw00011892
|
|
1
|
PCM cover
|
|
2
|
PCM connector
|
|
3
|
PCM
|
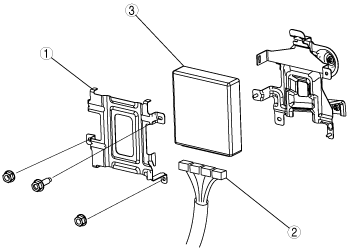
R.H.D.
am6zzw00011893
|
|
1
|
PCM cover No. 1
(See Set Bolt Removal Note.)
(See Set Bolt Installation Note.)
|
|
2
|
PCM bracket
|
|
3
|
PCM cover No. 2
|
|
4
|
PCM
|
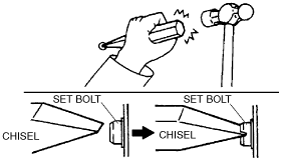
Set Bolt Removal Note
1. Using a chisel and a hammer, cut a groove on the head of the set nut/bolt so that a screwdriver can be inserted.
2. Loose the set nut/bolt using an impact screwdriver or pliers.
am6zzw00011894
|
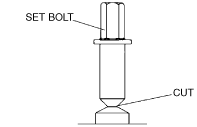
Set Bolt Installation Note
1. Install a new set nut/bolt and tighten it until the neck of the nut/bolt is cut.
am6zzw00011895
|