|
ac30zw00004845
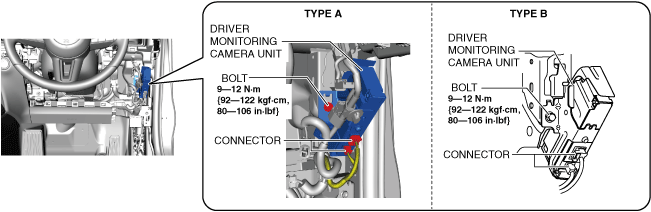
DRIVER MONITORING CAMERA UNIT REMOVAL/INSTALLATION [(E)]
id1520000117x2
L.H.D.
1. Disconnect the negative battery terminal. (See NEGATIVE BATTERY TERMINAL DISCONNECTION/CONNECTION [(E)].)
2. Remove the glove compartment. (See GLOVE COMPARTMENT REMOVAL/INSTALLATION.)
3. Remove the bolt.
ac30zw00004845
|
4. Disconnect the connectors.
5. Remove the driver monitoring camera unit.(See Driver Monitoring Camera Unit (Type B) Installation Note.)
6. Install in the reverse order of removal.
R.H.D.
1. Disconnect the negative battery terminal. (See NEGATIVE BATTERY TERMINAL DISCONNECTION/CONNECTION [(E)].)
2. Remove the following parts:
3. Disconnect the connectors.
ac30zw00004846
|
4. Remove the bolt.
5. Remove the driver monitoring camera unit.(See Driver Monitoring Camera Unit (Type B) Installation Note.)
6. Install in the reverse order of removal.
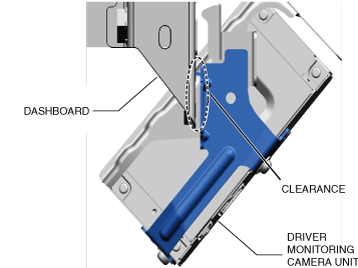
Driver Monitoring Camera Unit (Type B) Installation Note
1. Install the driver monitoring camera unit hook to the dashboard.
2. Verify that there is a clearance between the dashboard and the driver monitoring camera unit.
ac30zw00005101
|