1. Disconnect the negative battery cable.
2. Remove the under cover.
3. Remove the drive belt. (See DRIVE BELT REPLACEMENT [L3 Turbo].)
4. Remove the charge air cooler cover. (See INTAKE AIR SYSTEM REMOVAL/INSTALLATION [L3 Turbo].)
5. Remove the cowl panel. (See COWL PANEL REMOVAL/INSTALLATION.)
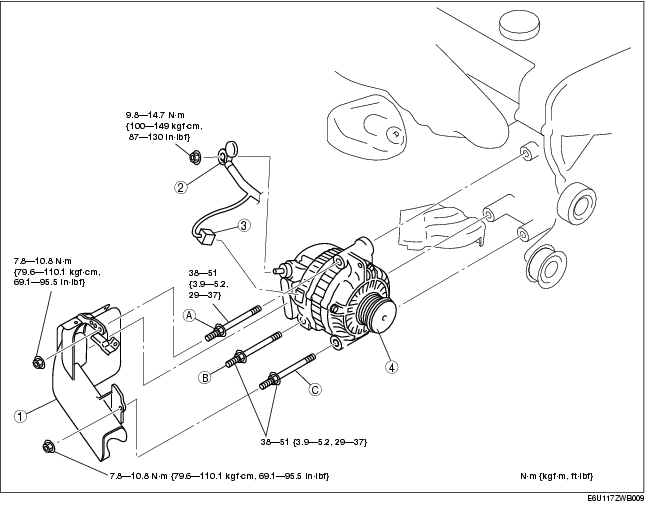
6. Remove in the order indicated in the table.
7. Install in the reverse order of removal.
.
1. Remove the generator from above the engine compartment.
1. Tighten bolt A temporarily.
2. Tighten bolt B, C to the specified tightening torque.
3. Tighten bolt A to the specified tightening torque.
1. Disconnect the negative battery cable.
2. Remove the under cover.
3. Remove the drive belt. (See DRIVE BELT REPLACEMENT [L3 Turbo].)
4. Remove the charge air cooler. (See INTAKE AIR SYSTEM REMOVAL/INSTALLATION [L3 Turbo].)
5. Remove the heat insulator (master cylinder side). (See EXHAUST SYSTEM REMOVAL/INSTALLATION [L3 Turbo].)
6. Disconnect the front drive shaft (RH) from the joint shaft. (See FRONT DRIVE SHAFT REMOVAL/INSTALLATION [L3 Turbo].)
7. Remove in the order indicated in the table.
8. Install in the reverse order of removal.
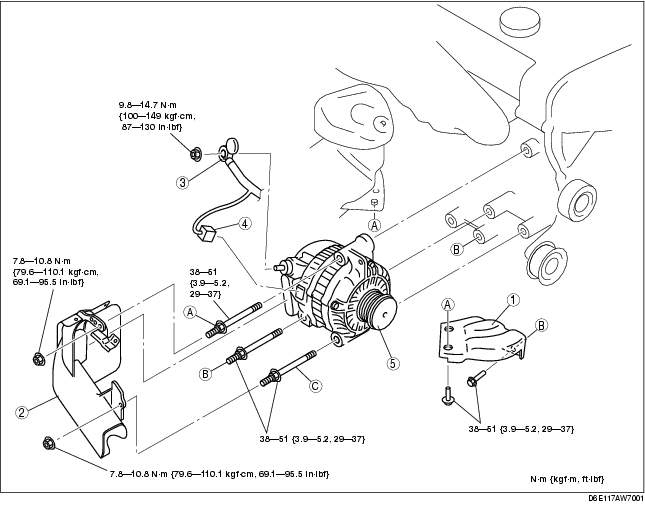
.
1. Remove the generator from below the engine compartment.
1. Tighten bolt A temporarily.
2. Tighten bolt B, C to the specified tightening torque.
3. Tighten bolt A to the specified tightening torque.