TRUNK SIDE INSULATOR REMOVAL/INSTALLATION
TRUNK SIDE INSULATOR REMOVAL/INSTALLATION
id091700612100
1. Disconnect the negative battery terminal. (See NEGATIVE BATTERY TERMINAL DISCONNECTION/CONNECTION [(E)].)
2. Remove the following parts:
- (1) Rear package tray (See REAR PACKAGE TRAY REMOVAL/INSTALLATION.)
-
- (2) Trunk covering (See TRUNK COVERING REMOVAL/INSTALLATION.)
-
- (3) Trunk board (See TRUNK BOARD REMOVAL/INSTALLATION [(E)].)
-
- (4) Trunk end trim (See TRUNK END TRIM REMOVAL/INSTALLATION.)
-
- (5) Rear scuff plate (See REAR SCUFF PLATE REMOVAL/INSTALLATION.)
-
- (6) Trunk side upper trim (See TRUNK SIDE UPPER TRIM REMOVAL/INSTALLATION.)
-
- (7) C-pillar trim (See C-PILLAR TRIM REMOVAL/INSTALLATION.)
-
- (8) Rear seat cushion (See REAR SEAT CUSHION REMOVAL/INSTALLATION.)
-
- (9) Rear seat back (See REAR SEAT BACK REMOVAL/INSTALLATION.)
-
- (10) Tire house trim (See TIRE HOUSE TRIM REMOVAL/INSTALLATION.)
-
- (11) Trunk side trim (See TRUNK SIDE TRIM REMOVAL/INSTALLATION [(E)].)
-
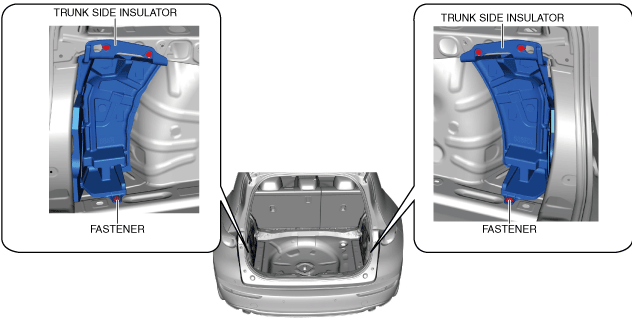
3. Remove the fasteners.
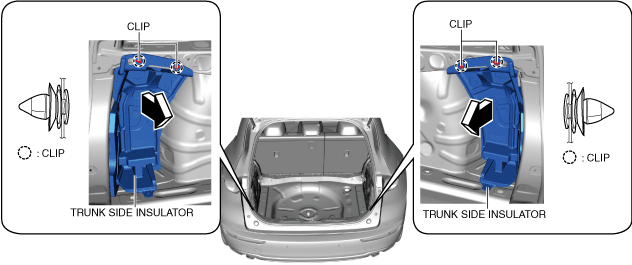
4. Remove the trunk side insulator in the direction of the arrows shown in the figure while detaching the clips.
5. Install in the reverse order of removal.