HIGH PRESSURE FUEL PUMP REMOVAL/INSTALLATION [SKYACTIV-X 2.0]
HIGH PRESSURE FUEL PUMP REMOVAL/INSTALLATION [SKYACTIV-X 2.0]
id0114hf801400
Replacement part
Fuel pipe
Quantity: 1
Location of use: High pressure fuel pump
O-ring
Quantity: 1
Location of use: High pressure fuel pump
O-ring
Quantity: 2
Location of use: Housing
O-ring
Quantity: 1
Location of use: Housing cover
Washer
Quantity: 1
Location of use: Housing
—
Oil and chemical type
Engine oil
Type: Recommended oil
Warning
• Always keep sparks and flames away from fuel. Fuel can easily ignite which could cause serious injury or death, and damage to equipment.
• Highly pressurized fuel may spray out if the fuel line is cut. Due to the following dangers occurring with a fuel spray, always complete the [Fuel Line Safety Procedure] to prevent the fuel from spraying.
― Fuel may cause irritation if it comes in contact with skin and eyes.
― If fuel ignites and causes a fire, it may lead to serious injury or death, and damage to property and facilities.
• A person charged with static electricity could cause a fire or explosion, resulting in death or serious injury. Before draining the fuel, always discharge static electricity by touching a vehicle.
Caution
• If the camshaft is turned with the piston position at the top dead center while the timing chain is removed, the valve and piston will contact each other and it could cause engine damage. When turning the camshaft with the timing chain removed, turn the camshaft after the piston has rotated the crankshaft 90 degrees from the top dead center position.
• Do not disassemble the high pressure fuel pump.
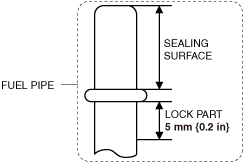
• Do not damage the seal surface and the lock part of the fuel pipe.
am3zzw00035667
• If there is any damage or deformation on the end area of the high pressure fuel pump, it could cause fuel leakage.
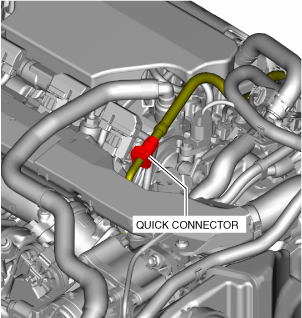
• Foreign matter on the connecting area of the quick release connector might cause damage to the connector or fuel pipe. To prevent this, disconnect the quick release connector and clean the connecting area before connecting it again.
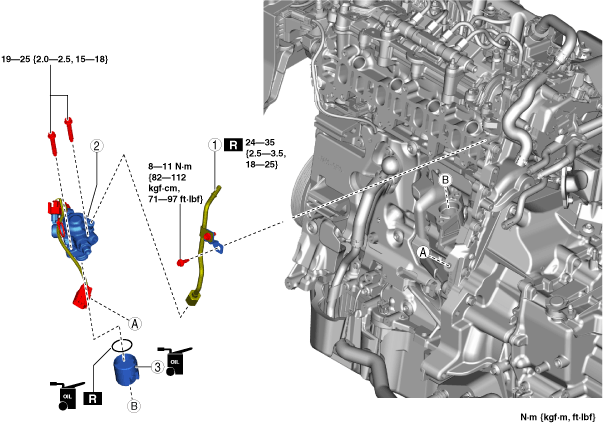
• Do not let foreign matter get into the fuel pipe to prevent clogging. In addition, always install the fuel pipe to the specified tightening torque.
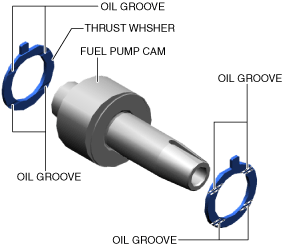
• Always install 1 thrust washer each at the front and back of the fuel pump cam.
1. Install the thrust washers to the fuel pump cam as shown in the figure.
am3zzw00038159
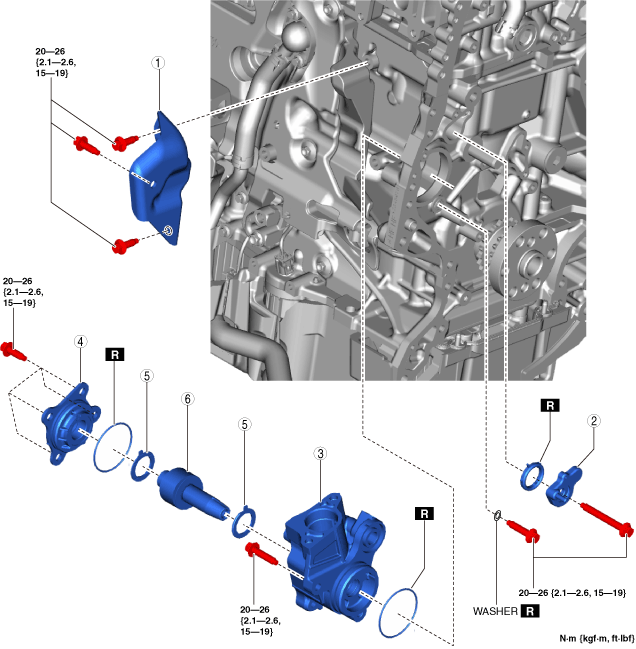
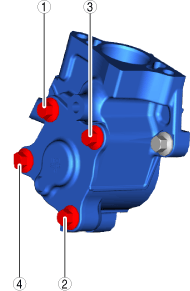
Housing Installation Note
1. Temporarily tighten the 3 housing installation bolts.
2. Tighten the housing installation bolts in any order to the specified torque.
Housing Cover Installation Note
1. Tighten the bolts in the order shown in the figure.
a59cjw00002300
Housing Bracket Installation Note
1. Temporarily tighten the 3 housing bracket installation bolts until the housing bracket is seated on the cylinder block.
2. Tighten the 3 housing bracket Installation bolts in any order to the specified torque.
High Pressure Fuel Pump Installation Note
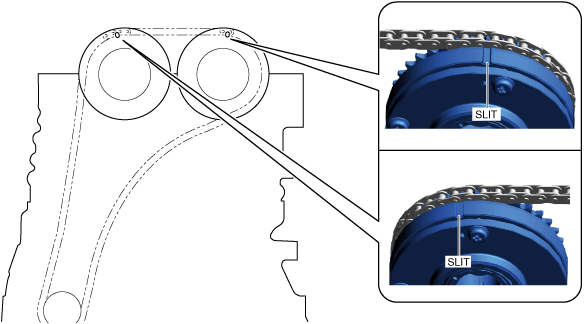
1. Rotate the crankshaft clockwise and align the slits on the actuator as shown in the figure to set cylinder No.1 to top dead center (TDC).
am3zzw00038158
2. Rotate the crankshaft 45 degrees clockwise from the cylinder No.1 top dead center (TDC) position.
3. Temporarily tighten 1 of the high pressure fuel pump installation bolts until the head of the high pressure fuel pump installation bolt contacts the high pressure fuel pump.
4. Tighten the high pressure fuel pump installation bolt that was not temporarily tightened in Step 3.
5. Tighten the high pressure fuel pump installation bolt that was temporarily tightened in Step 3.