 |
ac30zw00004909
INTAKE MANIFOLD REMOVAL/INSTALLATION [SKYACTIV-X 2.0]
id0113hf802000
Replacement parts
|
Gasket
Quantity: 1
Location of use: Water outlet pipe
|
Gasket
Quantity: 1
Location of use: Intake manifold
|
Gasket
Quantity: 1
Location of use: Water-cooled charge air cooler component
|
|
Vacuum hose
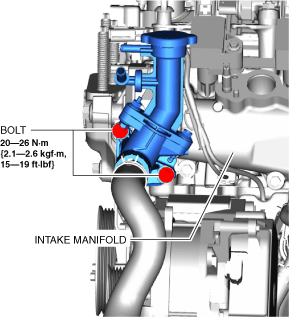
Quantity: 2
Location of use: EGR pressure sensorr
|
Clamp
Quantity: 1
Location of use: Supercharger component
|
Clamp
Quantity: 1
Location of use: EGR pipe
|
1. Disconnect the negative battery terminal. (See NEGATIVE BATTERY TERMINAL DISCONNECTION/CONNECTION [(E)].)
2. Drain the engine coolant. (See ENGINE COOLANT REPLACEMENT [SKYACTIV-X 2.0].)
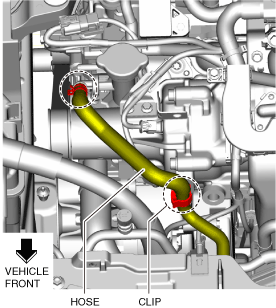
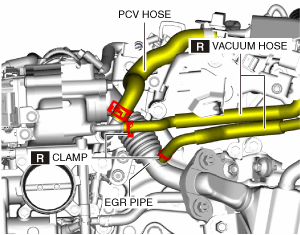
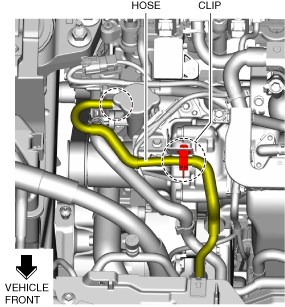
3. Disconnect the hose and clip shown in the figure.
ac30zw00004909
|
4. Disconnect the hose and clip shown in the figure.
ac30zw00004910
|
5. Remove the coolant reserve tank. (See COOLANT RESERVE TANK REMOVAL/INSTALLATION [SKYACTIV-X 2.0].)
6. Remove the water-cooled charge air cooler reserve tank. (See WATER-COOLED CHARGE AIR COOLER RESERVE TANK REMOVAL/INSTALLATION [SKYACTIV-X 2.0].)
7. Remove the cooling fan motor. (See COOLING FAN MOTOR REMOVAL/INSTALLATION [SKYACTIV-X 2.0].)
8. Remove the bolts shown in the figure.
ac30zw00004911
|
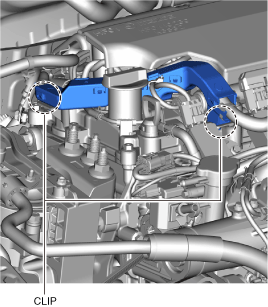
9. Disconnect the clips shown in the figure.
ac30zw00004912
|
10. Disconnect the starter terminal S connector. (See STARTER REMOVAL/INSTALLATION [SKYACTIV-X 2.0].)
11. Disconnect the integrated starter generator (ISG) terminal B cable. (See INTEGRATED STARTER GENERATOR (ISG) REMOVAL/INSTALLATION [SKYACTIV-X 2.0].)
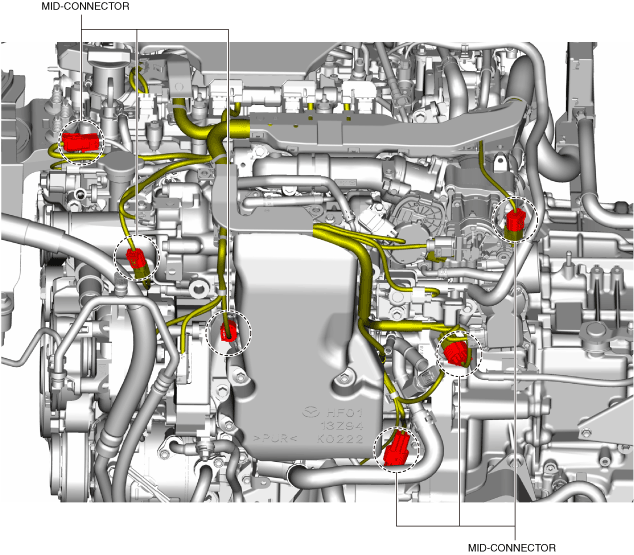
12. Disconnect the mid-connectors shown in the figure.
ac30zw00004913
|
13. Disconnect the connectors of the following parts:
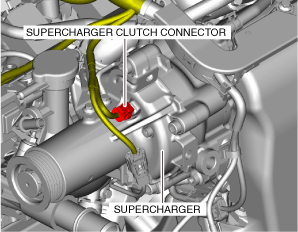
14. Disconnect the supercharger clutch connector.
ac30zw00004914
|
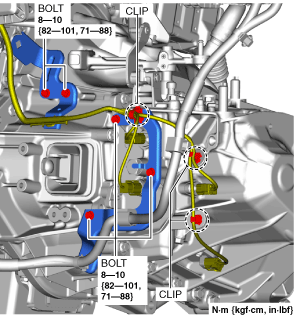
15. Disconnect the clip and remove the bolts shown in the figure. (ATX)
ac30zw00004915
|
16. Disconnect the clips and remove the bolts shown in the figure. (MTX)
ac30zw00004916
|
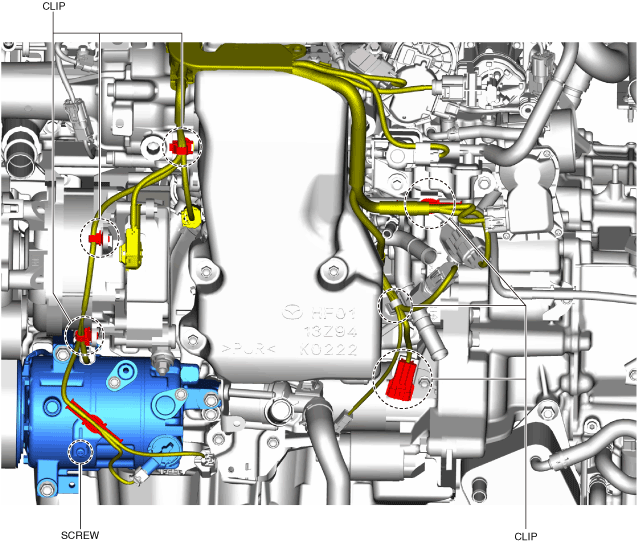
17. Disconnect the clips and remove the screw shown in the figure.
ac30zw00004917
|
18. Remove the bolts shown in the figure.
ac30zw00004918
|
19. Set the wiring harness aside as shown in the figure.
ac30zw00004919
|
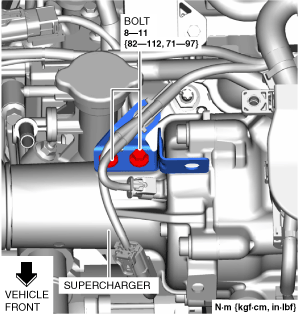
20. Remove the bolt shown in the figure.
ac30zw00004920
|
21. Disconnect the hoses shown in the figure.
am3zzw00035798
|
22. Remove the purge solenoid valve component. (See PURGE SOLENOID VALVE REMOVAL/INSTALLATION [SKYACTIV-X 2.0].)
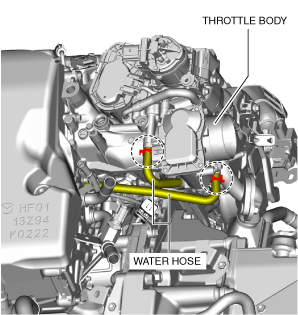
23. Disconnect the water hoses shown in the figure.
ac30zw00004922
|
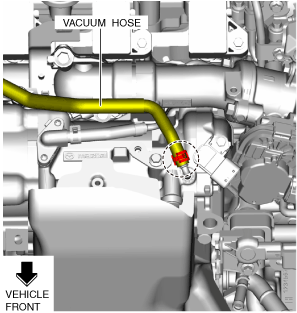
24. Disconnect the vacuum hose shown in the figure.
ac30zw00004923
|
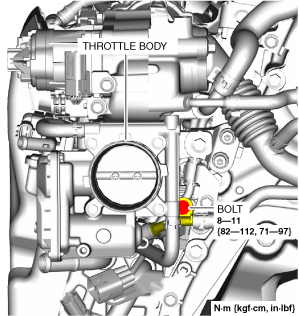
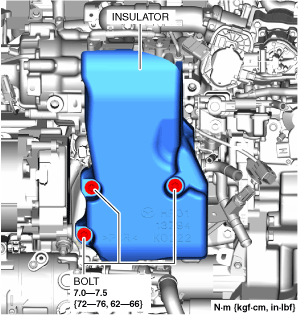
25. Remove the insulator shown in the figure.
ac30zw00004924
|
26. Remove air pipe No.1. (See AIR PIPE REMOVAL/INSTALLATION [SKYACTIV-X 2.0].)
27. Remove the water pump drive belt from the supercharger and set it aside. (See DRIVE BELT REMOVAL/INSTALLATION [SKYACTIV-X 2.0].)
28. Set aside the EGR cooler with the water hose connected. (See EGR COOLER REMOVAL/INSTALLATION [SKYACTIV-X 2.0].)
29. Remove the supercharger. (See SUPERCHARGER REMOVAL/INSTALLATION [SKYACTIV-X 2.0])
30. Remove air pipe No.2. (See AIR PIPE REMOVAL/INSTALLATION [SKYACTIV-X 2.0].)
31. Remove the water outlet pipe.
ac30zw00003120
|
32. Remove the ignition coils. (See IGNITION COIL REMOVAL/INSTALLATION [SKYACTIV-X 2.0].)
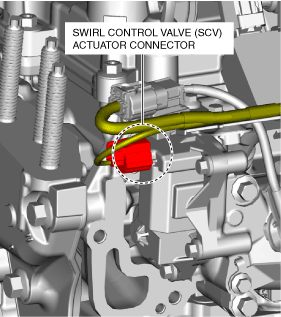
33. Detach the swirl control valve (SCV) actuator connector shown in the figure.
ac30zw00003121
|
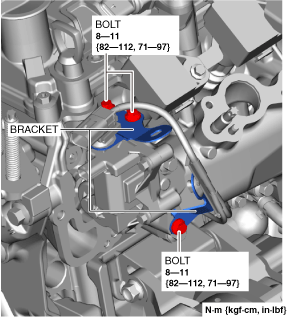
34. Remove the bracket shown in the figure.
ac30zw00004925
|
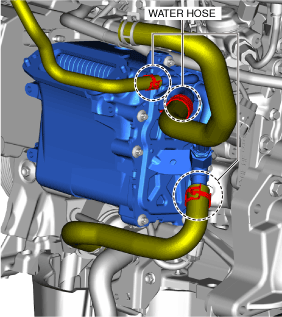
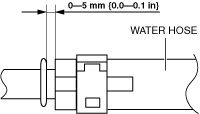
35. Disconnect the water hose shown in the figure.
am3zzw00035810
|
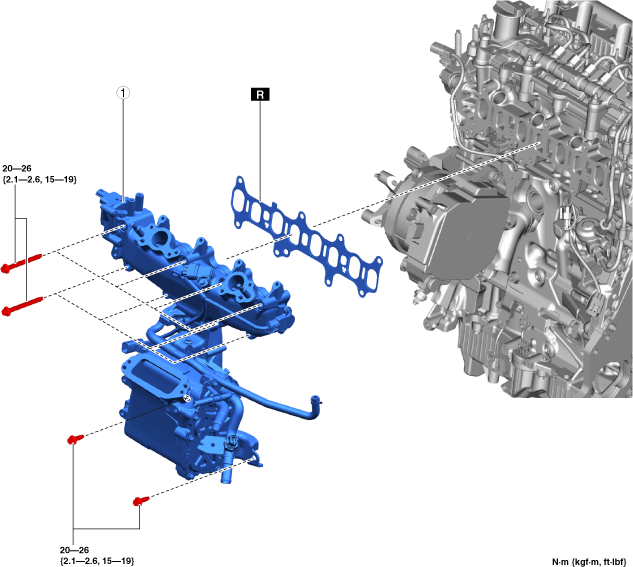
36. Remove using the procedure shown in the figure.
37. Install in the reverse order of removal.
Step 1
ac30zw00004926
|
|
1
|
Intake manifold component
|
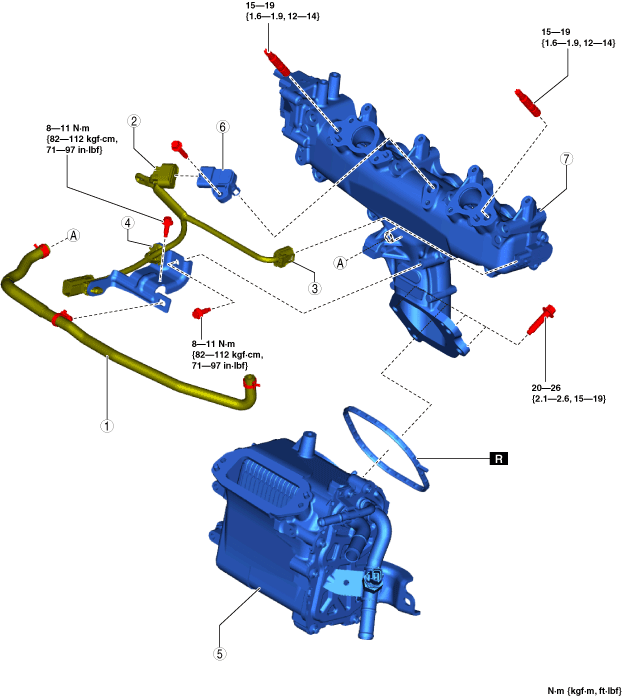
Step 2
ac30zw00004927
|
|
1
|
Water hose
(See Water Hose Installation Note.)
|
|
2
|
Boost Air Pressure Sensor/boost Air Temperature Sensor connector
|
|
3
|
swirl control valve (SCV) position sensor connector
|
|
4
|
Wiring harness bracket
|
|
5
|
Water-cooled charge air cooler component
|
|
6
|
Boost Air Pressure Sensor/boost Air Temperature Sensor
|
|
7
|
Intake manifold
|
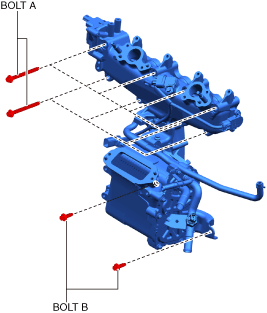
Intake Manifold Component Installation Note
1. Temporarily tighten any 2 of bolts A until they are seated.
ac30zw00004928
|
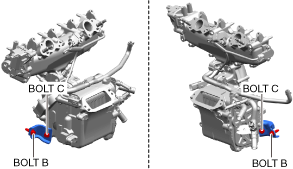
2. Tighten bolts A.
3. Temporarily tighten bolts B.
4. Loosen bolts C.
ac30zw00004929
|
5. Temporarily tighten bolts C.
6. Tighten bolts B and C.
Water Hose Installation Note
1. Install the water hose as shown in the figure.
am3zzw00035814
|