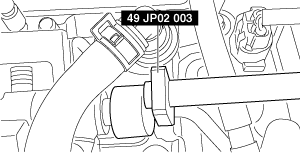
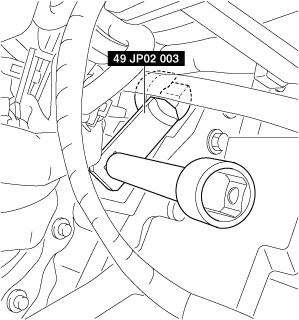
49 JP02 003
Fuel pipe flare nut wrench

INJECTION PIPE REMOVAL/INSTALLATION [SKYACTIV-X 2.0]
id0114hf850200
Special service tool (SST)
|
49 JP02 003
Fuel pipe flare nut wrench
|
|
Replacement part
|
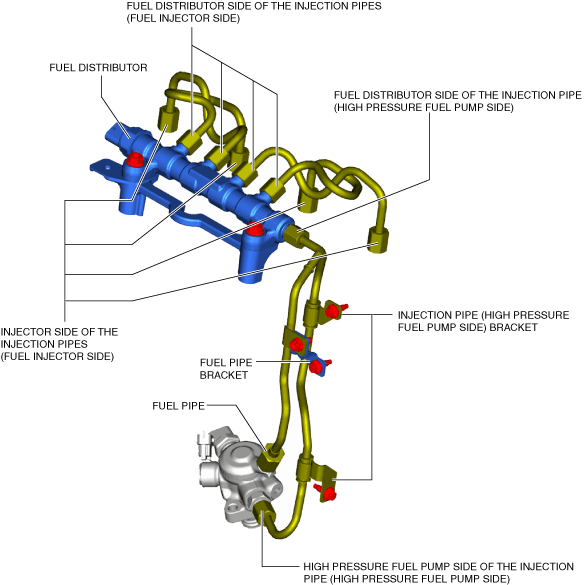
Injection pipe (fuel injector side)
Quantity: 4
Location of use: Fuel distributor
|
Injection pipe (high pressure fuel pump side)
Quantity: 1
Location of use: Fuel distributor
|
Vacuum hose
Quantity: 1
Location of use: Supercharger component
|
|
Oil filler pipe
Quantity: 1
Location of use: Cylinder head cover
|
Clamp
Quantity: 1
Location of use: Supercharger component
|
—
|
1. Perform the [Fuel Line Safety Procedure] referring to the [BEFORE SERVICE PRECAUTION]. (See BEFORE SERVICE PRECAUTION [SKYACTIV-X 2.0].)
2. Disconnect the negative battery terminal. (See NEGATIVE BATTERY TERMINAL DISCONNECTION/CONNECTION [(E)].)
3. Remove the engine cover. (See ENGINE COVER REMOVAL/INSTALLATION [SKYACTIV-X 2.0].)
4. Remove the following parts. (See SIDE WALL REMOVAL/INSTALLATION [SKYACTIV-X 2.0].)
5. Remove the following parts as a single unit. (See AIR CLEANER REMOVAL/INSTALLATION [SKYACTIV-X 2.0].)
6. Remove the resonance chamber. (See AIR CLEANER REMOVAL/INSTALLATION [SKYACTIV-X 2.0].)
7. Remove the battery. (See BATTERY REMOVAL/INSTALLATION [SKYACTIV-X 2.0].)
8. Remove the battery tray and PCM as a single unit. (See BATTERY REMOVAL/INSTALLATION [SKYACTIV-X 2.0].)
9. Remove the seal cover. (See SEAL COVER REMOVAL/INSTALLATION [SKYACTIV-X 2.0].)
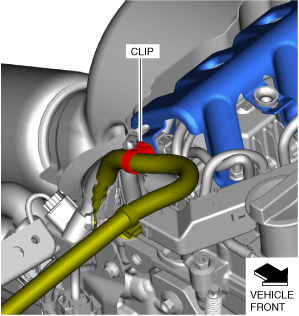
10. Disconnect the clips shown in the figure.
am3zzw00035817
|
11. Remove the bolts and nuts and set the protector aside. (See SEAL COVER REMOVAL/INSTALLATION [SKYACTIV-X 2.0].)
am3zzw00035818
|
12. Remove the oil filler cap.
13. Remove the oil filler pipe.
ac30zw00004892
|
14. Disconnect the connector shown in the figure and remove the bolts.
am3zzw00035819
|
15. Disconnect the ignition coil No.4 connector.
16. Remove ignition coil No.4.
17. Remove the fuel injector connector.
18. Set aside the EGR cooler with the water hose connected. (See EGR COOLER REMOVAL/INSTALLATION [SKYACTIV-X 2.0].)
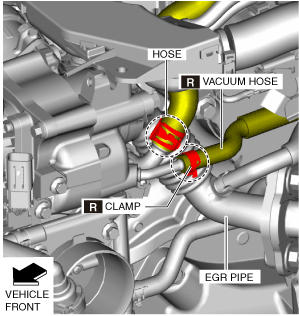
19. Disconnect the hoses shown in the figure.
ac30zw00004977
|
20. Set aside the throttle body with the water hose connected. (See THROTTLE BODY REMOVAL/INSTALLATION [SKYACTIV-X 2.0].)
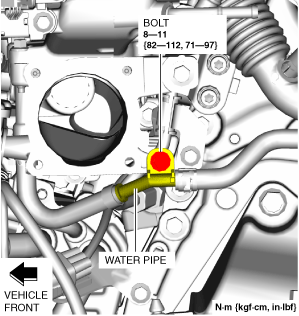
21. Remove the water pipe bolt shown in the figure.
am3zzw00035821
|
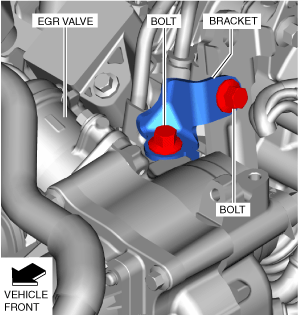
22. Remove the bracket shown in the figure. (See SUPERCHARGER REMOVAL/INSTALLATION [SKYACTIV-X 2.0].)
am3zzw00035822
|
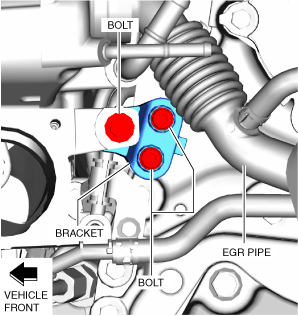
23. Remove the bracket shown in the figure. (See EGR PIPE REMOVAL/INSTALLATION [SKYACTIV-X 2.0].)
am3zzw00035823
|
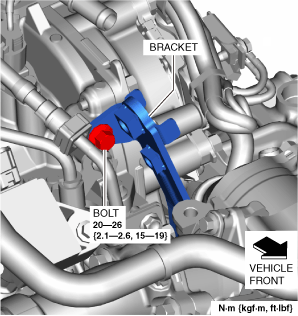
24. Remove the bracket shown in the figure. (See EGR PIPE REMOVAL/INSTALLATION [SKYACTIV-X 2.0].)
am3zzw00035824
|
25. Set aside the EGR pipe with the EGR sensor hose connected. (See EGR PIPE REMOVAL/INSTALLATION [SKYACTIV-X 2.0].)
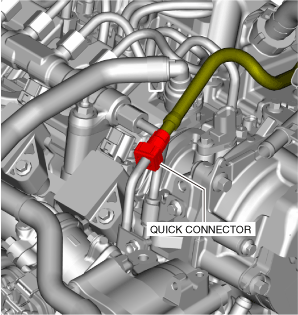
26. Disconnect the quick release connector shown in the figure. (See QUICK RELEASE CONNECTOR (FUEL SYSTEM) REMOVAL/INSTALLATION [SKYACTIV-X 2.0].)
am3zzw00035825
|
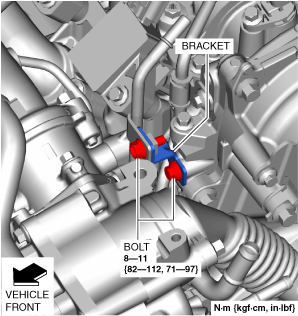
27. Remove the bracket shown in the figure.
am3zzw00035826
|
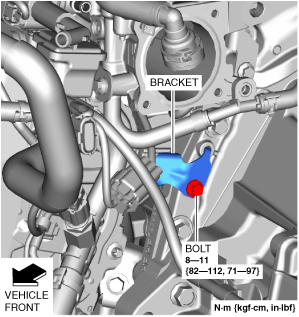
28. Remove the bracket shown in the figure.
am3zzw00035827
|
29. Remove the injection pipe. (See Injection Pipe (High Pressure Fuel Pump Side) Removal Note.) (See Injection Pipe Installation Note.)
30. Install in the reverse order of removal.
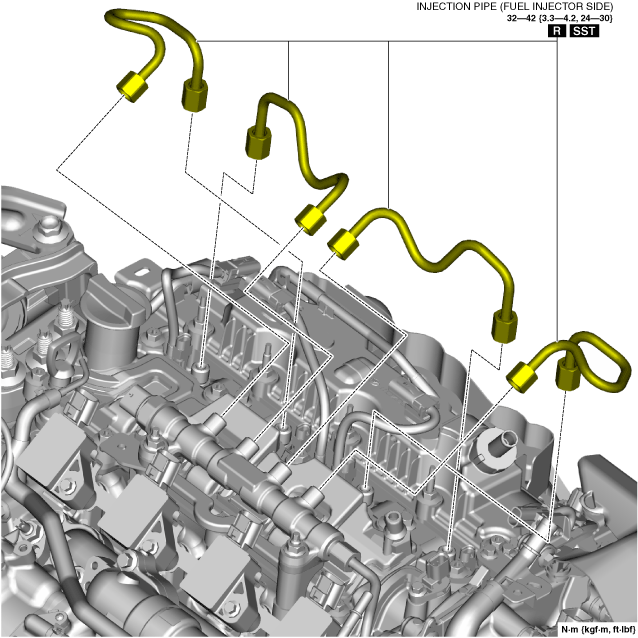
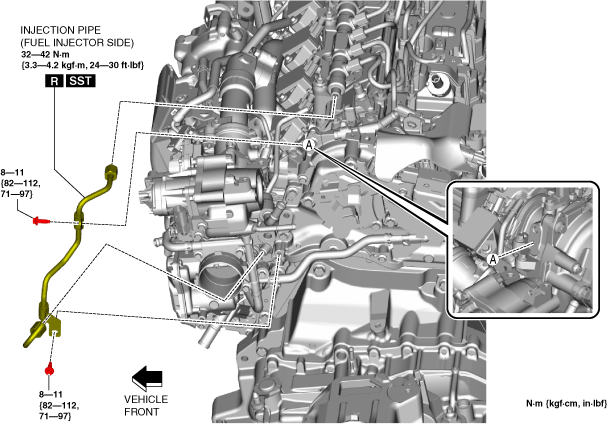
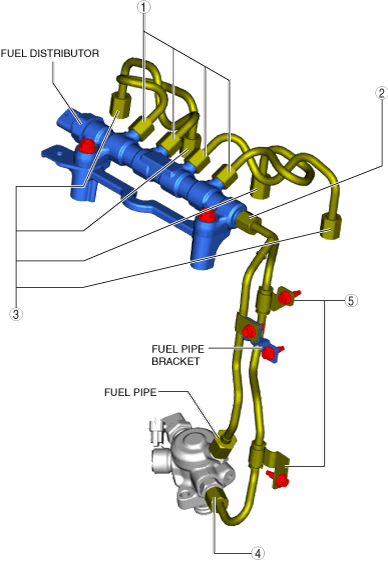
Injection pipe (fuel injector side)
ac30zw00004989
|
Injection pipe (high pressure fuel pump side)
am3zzw00035829
|
Injection Pipe (High Pressure Fuel Pump Side) Removal Note
1. Remove the injection pipe (high pressure fuel pump side) using the SST.
Fuel distributor side
am30jw00000614
|
High pressure fuel pump side
am30jw00000615
|
Injection Pipe Installation Note
1. Perform the following procedure.
am3zzw00035830
|
2. Temporarily tighten the injection pipes.
3. Temporarily tighten the injection pipe (high pressure fuel pump side) brackets.
4. Perform the following procedure.
5. Tighten the fuel injection pipe connector in the order shown in the figure.
ac30zw00004893
|
6. Perform the following procedure.
7. Tighten the fuel distributor to the specified torque. (See FUEL DISTRIBUTOR REMOVAL/INSTALLATION [SKYACTIV-X 2.0].)