 |
am3zzw00035761
SUPERCHARGER SPEED SENSOR REMOVAL/INSTALLATION [SKYACTIV-X 2.0]
id0140hf495100
Replacement Part
|
O-ring
Quantity: 1
Location of use: Supercharger speed sensor
|
1. Disconnect the negative battery terminal. (See NEGATIVE BATTERY TERMINAL DISCONNECTION/CONNECTION [(E)].)
2. Remove the engine cover. (See ENGINE COVER REMOVAL/INSTALLATION [SKYACTIV-X 2.0].)
3. Remove the following parts; (See SIDE WALL REMOVAL/INSTALLATION [SKYACTIV-X 2.0].)
4. Remove the battery. (See BATTERY REMOVAL/INSTALLATION [SKYACTIV-X 2.0].)
5. Remove the battery tray and PCM as a single unit. (See BATTERY REMOVAL/INSTALLATION [SKYACTIV-X 2.0].)
6. Remove the following parts as a single unit: (See AIR CLEANER REMOVAL/INSTALLATION [SKYACTIV-X 2.0].)
7. Remove the resonance chamber. (See AIR CLEANER REMOVAL/INSTALLATION [SKYACTIV-X 2.0].)
8. Remove the front under cover No.1 and No.2. (See FRONT UNDER COVER No.1 REMOVAL/INSTALLATION.)(See FRONT UNDER COVER No.2 REMOVAL/INSTALLATION.)
9. Remove the splash shield. (See SPLASH SHIELD REMOVAL/INSTALLATION.)
10. Drain the engine coolant and water-cooled charge air cooler coolant. (See ENGINE COOLANT REPLACEMENT [SKYACTIV-X 2.0].)(See WATER-COOLED CHARGE AIR COOLER COOLANT REPLACEMENT [SKYACTIV-X 2.0].)
11. Remove the coolant reserve tank. (See COOLANT RESERVE TANK REMOVAL/INSTALLATION [SKYACTIV-X 2.0].)
12. Remove the water-cooled charge air cooler reserve tank. (See WATER-COOLED CHARGE AIR COOLER RESERVE TANK REMOVAL/INSTALLATION [SKYACTIV-X 2.0].)
13. Remove the cooling fan component. (See COOLING FAN MOTOR REMOVAL/INSTALLATION [SKYACTIV-X 2.0].)
14. Disconnect the terminal S connector. (See STARTER REMOVAL/INSTALLATION [SKYACTIV-X 2.0].)
15. Disconnect the terminal B cable. (See INTEGRATED STARTER GENERATOR (ISG) REMOVAL/INSTALLATION [SKYACTIV-X 2.0].)
16. Remove the supercharger. (See SUPERCHARGER REMOVAL/INSTALLATION [SKYACTIV-X 2.0].)
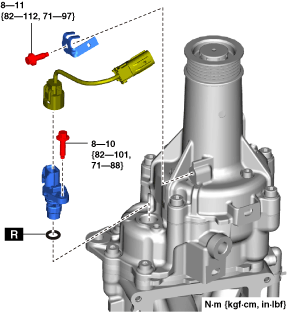
17. Remove the supercharger speed sensor.
am3zzw00035761
|
18. Install in the reverse order of removal.